


Developing a WordPress Plugin: A Step-by-Step Guide
WordPress plugins are a great way to extend the functionality of your website. If you’re a WordPress user and you have an idea for a plugin that could enhance your site, or you want to share your plugin with the world, this guide is for you. In this post, we’ll walk you through the process of developing a WordPress plugin from scratch.
Table of Contents
1. Setting Up a Development Environment
Before you start developing your plugin, you’ll need to set up a local development environment. This will allow you to test your plugin on your own machine without affecting your live website. Here are the steps to set up your development environment:
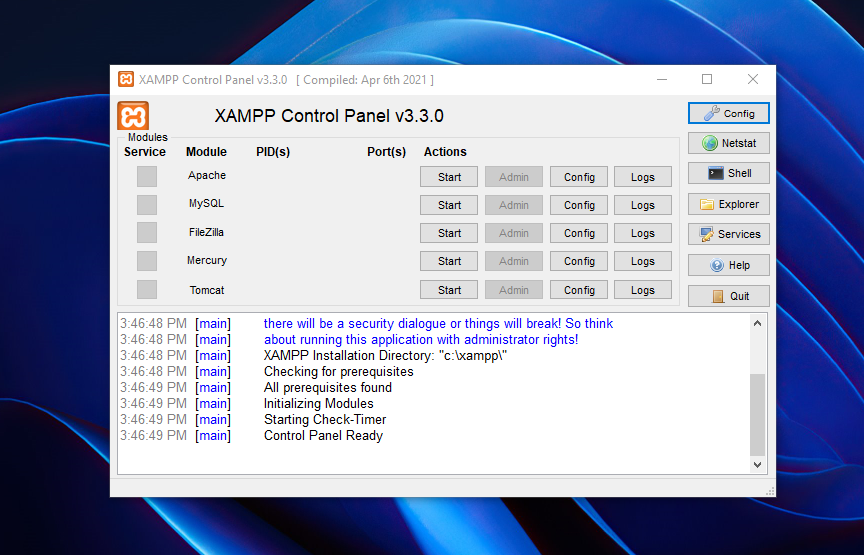
Once you’ve set up your development environment, you’re ready to start creating your plugin.
2. Creating Your Plugin
Creating a WordPress plugin involves creating a set of files and writing code that WordPress will recognize and execute when the plugin is activated. Here’s an overview of the steps involved:
- Create a new folder in the wp-content/plugins directory of your WordPress installation. Name the folder something descriptive of your plugin.
					/*
Plugin Name: My Plugin
Plugin URI: https://myplugin.com/
Description: A brief description of my plugin.
Version: 1.0
Author: My Name
Author URI: https://mywebsite.com/
License: GPL2
*/
- Add any necessary PHP code to your main plugin file to create the functionality you want for your plugin. This can include creating custom post types, adding custom fields to existing post types, creating new widgets, or anything else you can imagine.
Here’s an example of a simple plugin that adds a custom post type called “Books“:
					function my_plugin_create_post_type() {
    $labels = array(
        'name' => __( 'Books' ),
        'singular_name' => __( 'Book' ),
        'add_new' => __( 'Add New Book' ),
        'add_new_item' => __( 'Add New Book' ),
        'edit_item' => __( 'Edit Book' ),
        'new_item' => __( 'New Book' ),
        'view_item' => __( 'View Book' ),
        'search_items' => __( 'Search Books' ),
        'not_found' => __( 'No books found' ),
        'not_found_in_trash' => __( 'No books found in trash' )
    );

    $args = array(
        'labels' => $labels,
        'public' => true,
        'has_archive' => true,
        'menu_position' => 5,
        'menu_icon' => 'dashicons-book-alt',
        'supports' => array( 'title', 'editor', 'thumbnail', 'excerpt' ),
    );

    register_post_type( 'book', $args);
}
add_action( 'init', 'my_plugin_create_post_type' );
In this example, the code registers a new custom post type called “Books” and adds it to the WordPress admin menu with a custom icon. It also adds support for a title, editor, thumbnail, and excerpt fields.
- Save your main plugin file and activate your plugin from the WordPress admin panel. You can find your plugin in the “Plugins” section of the admin panel.
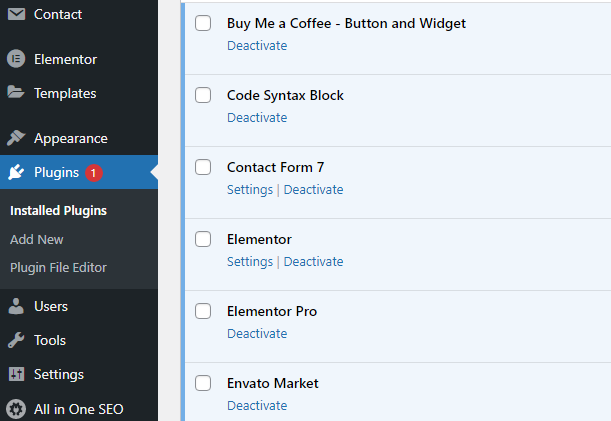
That’s it! Your plugin is now up and running, and you can continue to add functionality as needed.
3. Tips for Developing a WordPress Plugin
Here are a few tips to keep in mind as you develop your WordPress plugin:
- Plan your plugin carefully before you start coding. Define what functionality you want to add and how you want to add it.
- Use best practices when writing code. This includes following the WordPress coding standards, using proper PHP syntax, and avoiding security vulnerabilities.
- Use WordPress functions and APIs whenever possible. This will help ensure compatibility with other plugins and future versions of WordPress.
- Test your plugin thoroughly before releasing it to the public. Make sure it works as expected and doesn’t conflict with other plugins or themes.
- Document your code and provide clear instructions for users. This will make it easier for others to understand and use your plugin.
Conclusion
Developing a WordPress plugin can be a rewarding experience that allows you to add custom functionality to your site or share your work with the world. By following the steps outlined in this post and keeping these tips in mind, you can create a high-quality plugin that meets your needs and the needs of your users. Happy coding!